
This tutorial dives into the creation of smart contract accounts and how this can be used as an identity platform also capable of payments

The first step is to setup the passkey-kit demo which we will be using as a boilerplate.
You can clone the repo from here: https://github.com/kalepail/passkey-kit
Go into passkey-kit/demo and edit the .env.example file.
You’ll need API keys for the following services:
- LaunchTube You can get testnet JWT from here: https://testnet.launchtube.xyz/gen
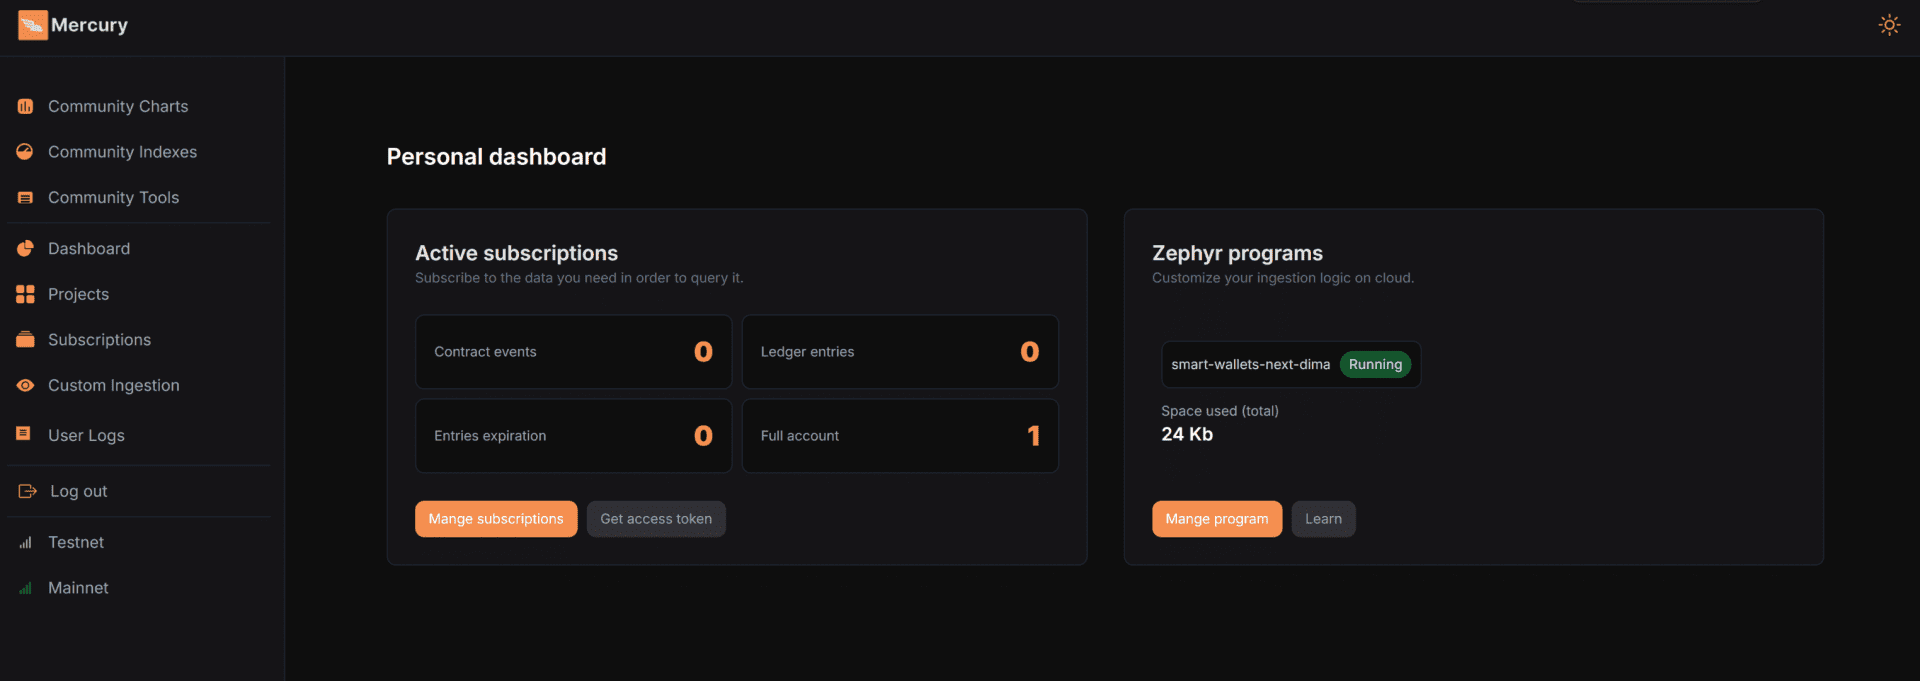
- Mercury You can get an access key from here (requires free account): https://test.mercurydata.app/
Edit the VITE_launchtubeJwt and VITE_mercuryJwt fields in the .env file and fill in your access tokens. Save the file as .env renaming it from .env.example
Now let install the Mercury client
cd ./zephyr
cargo install mercury-cli
export MERCURY_JWT="<YOUR.MERCURY.JWT>"
mercury-cli --jwt $MERCURY_JWT --local false --mainnet false deploy
You should now be able to see a new project in your mercury dashboard
The official docs use pnpm which is a package manager for npm modules. Install this and then setup the project
sudo npm install -g pnpm
sudo pnpm i
pnpm run build
cd demo
pnpm i
pnpm run start
Assuming all goes well you should get a little test server running on port 5173
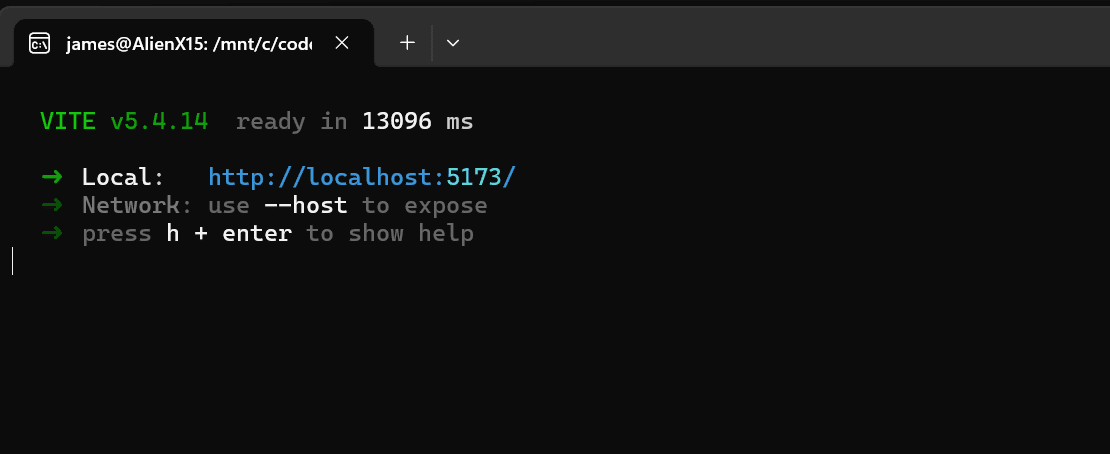
Visit the localhost:5173 URL in a browser and you should see the demo app where you can create passkey based smart wallets.
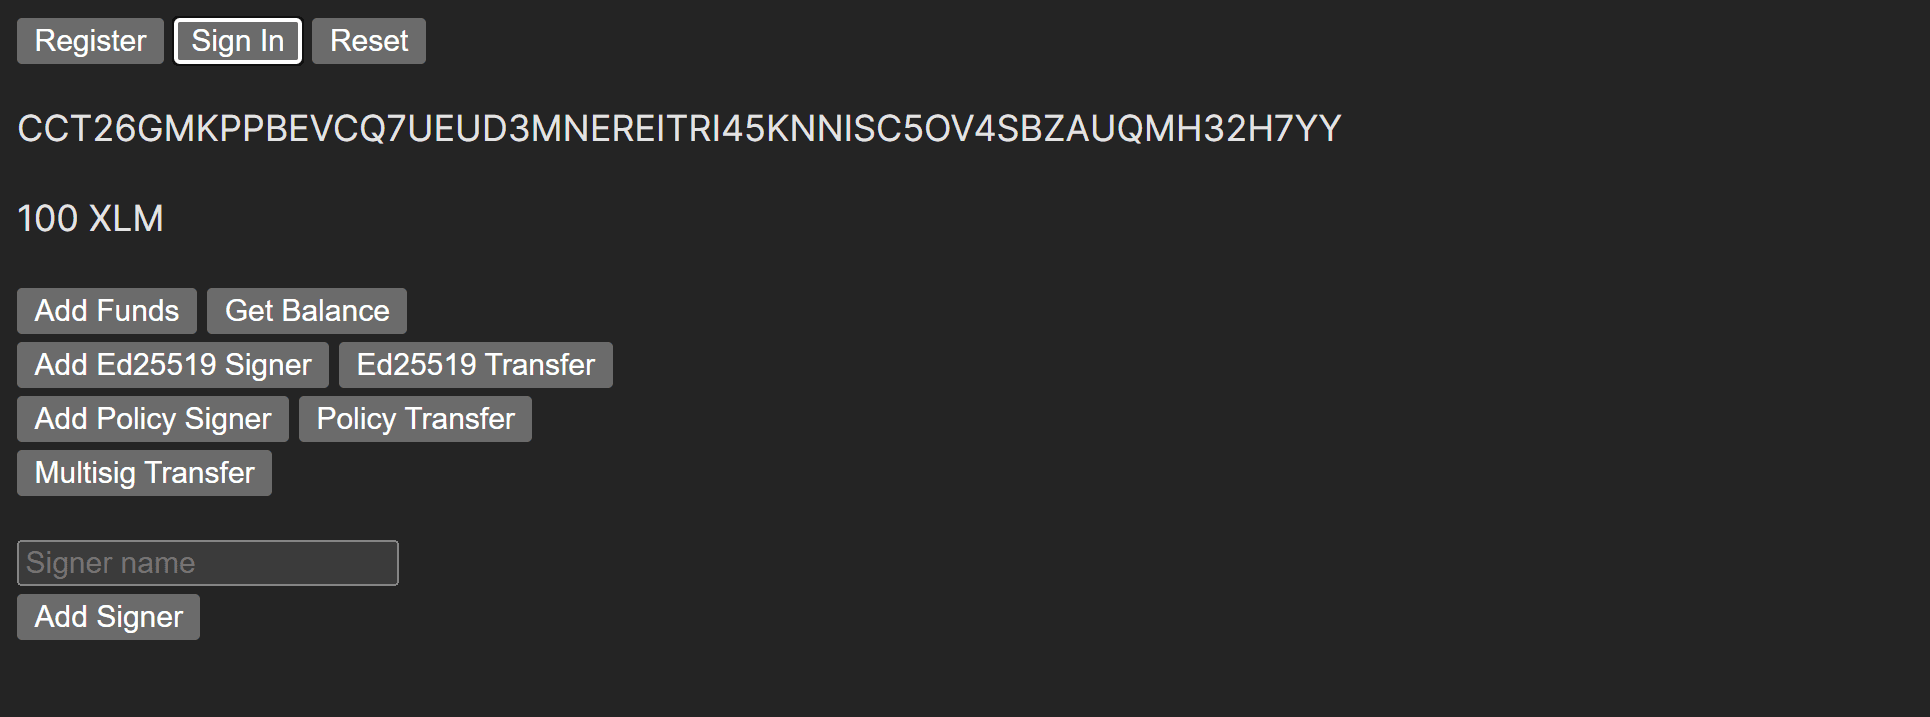
When you are registering a new account on the web application a new contract is deployed. This contract is your “smart wallet” and contains any custom logic required such as:
- Social Recovery – Regain access without seed phrases using trusted guardians.
- Custom Authentication – Support passkeys, biometrics, or other login methods.
- Gas Abstraction – Enable gasless transactions for a smoother user experience.
- Programmable Security – Add spending limits, time locks, and multisig rules.
- Upgradability – Improve or patch wallet logic without migrating accounts.
- Session Keys – Allow temporary permissions for safe, limited use.
- Role Based Access – Grant different permissions to users or devices.
- Seamless dApp Integration – Pre-approve contracts or automate interactions.
Potential Issues
Here are some problems I ran into along the way…
If you are getting this error you might be on the public demo rather than localhost: {“status”:400,”error”:”No credits left”}
I had to resync my wsl timeclock as was getting this error:
{“status”:400,”error”:”Transaction timeout must be no greater than 30 seconds”}
To do this on the host device, in windows, open up powershell as administrator and run
w32tm /resyncThat will resync the time settings from the host to the linux container and fix that issue.
The Smart Wallet
So the passkey-kit demo shows how we can use smart wallets for auth on a web app but let’s dive in and see what else we can do with these contracts.
If we take the contract/wallet ID and put this into a block explorer like Stellar.expert we can pull up an interface.
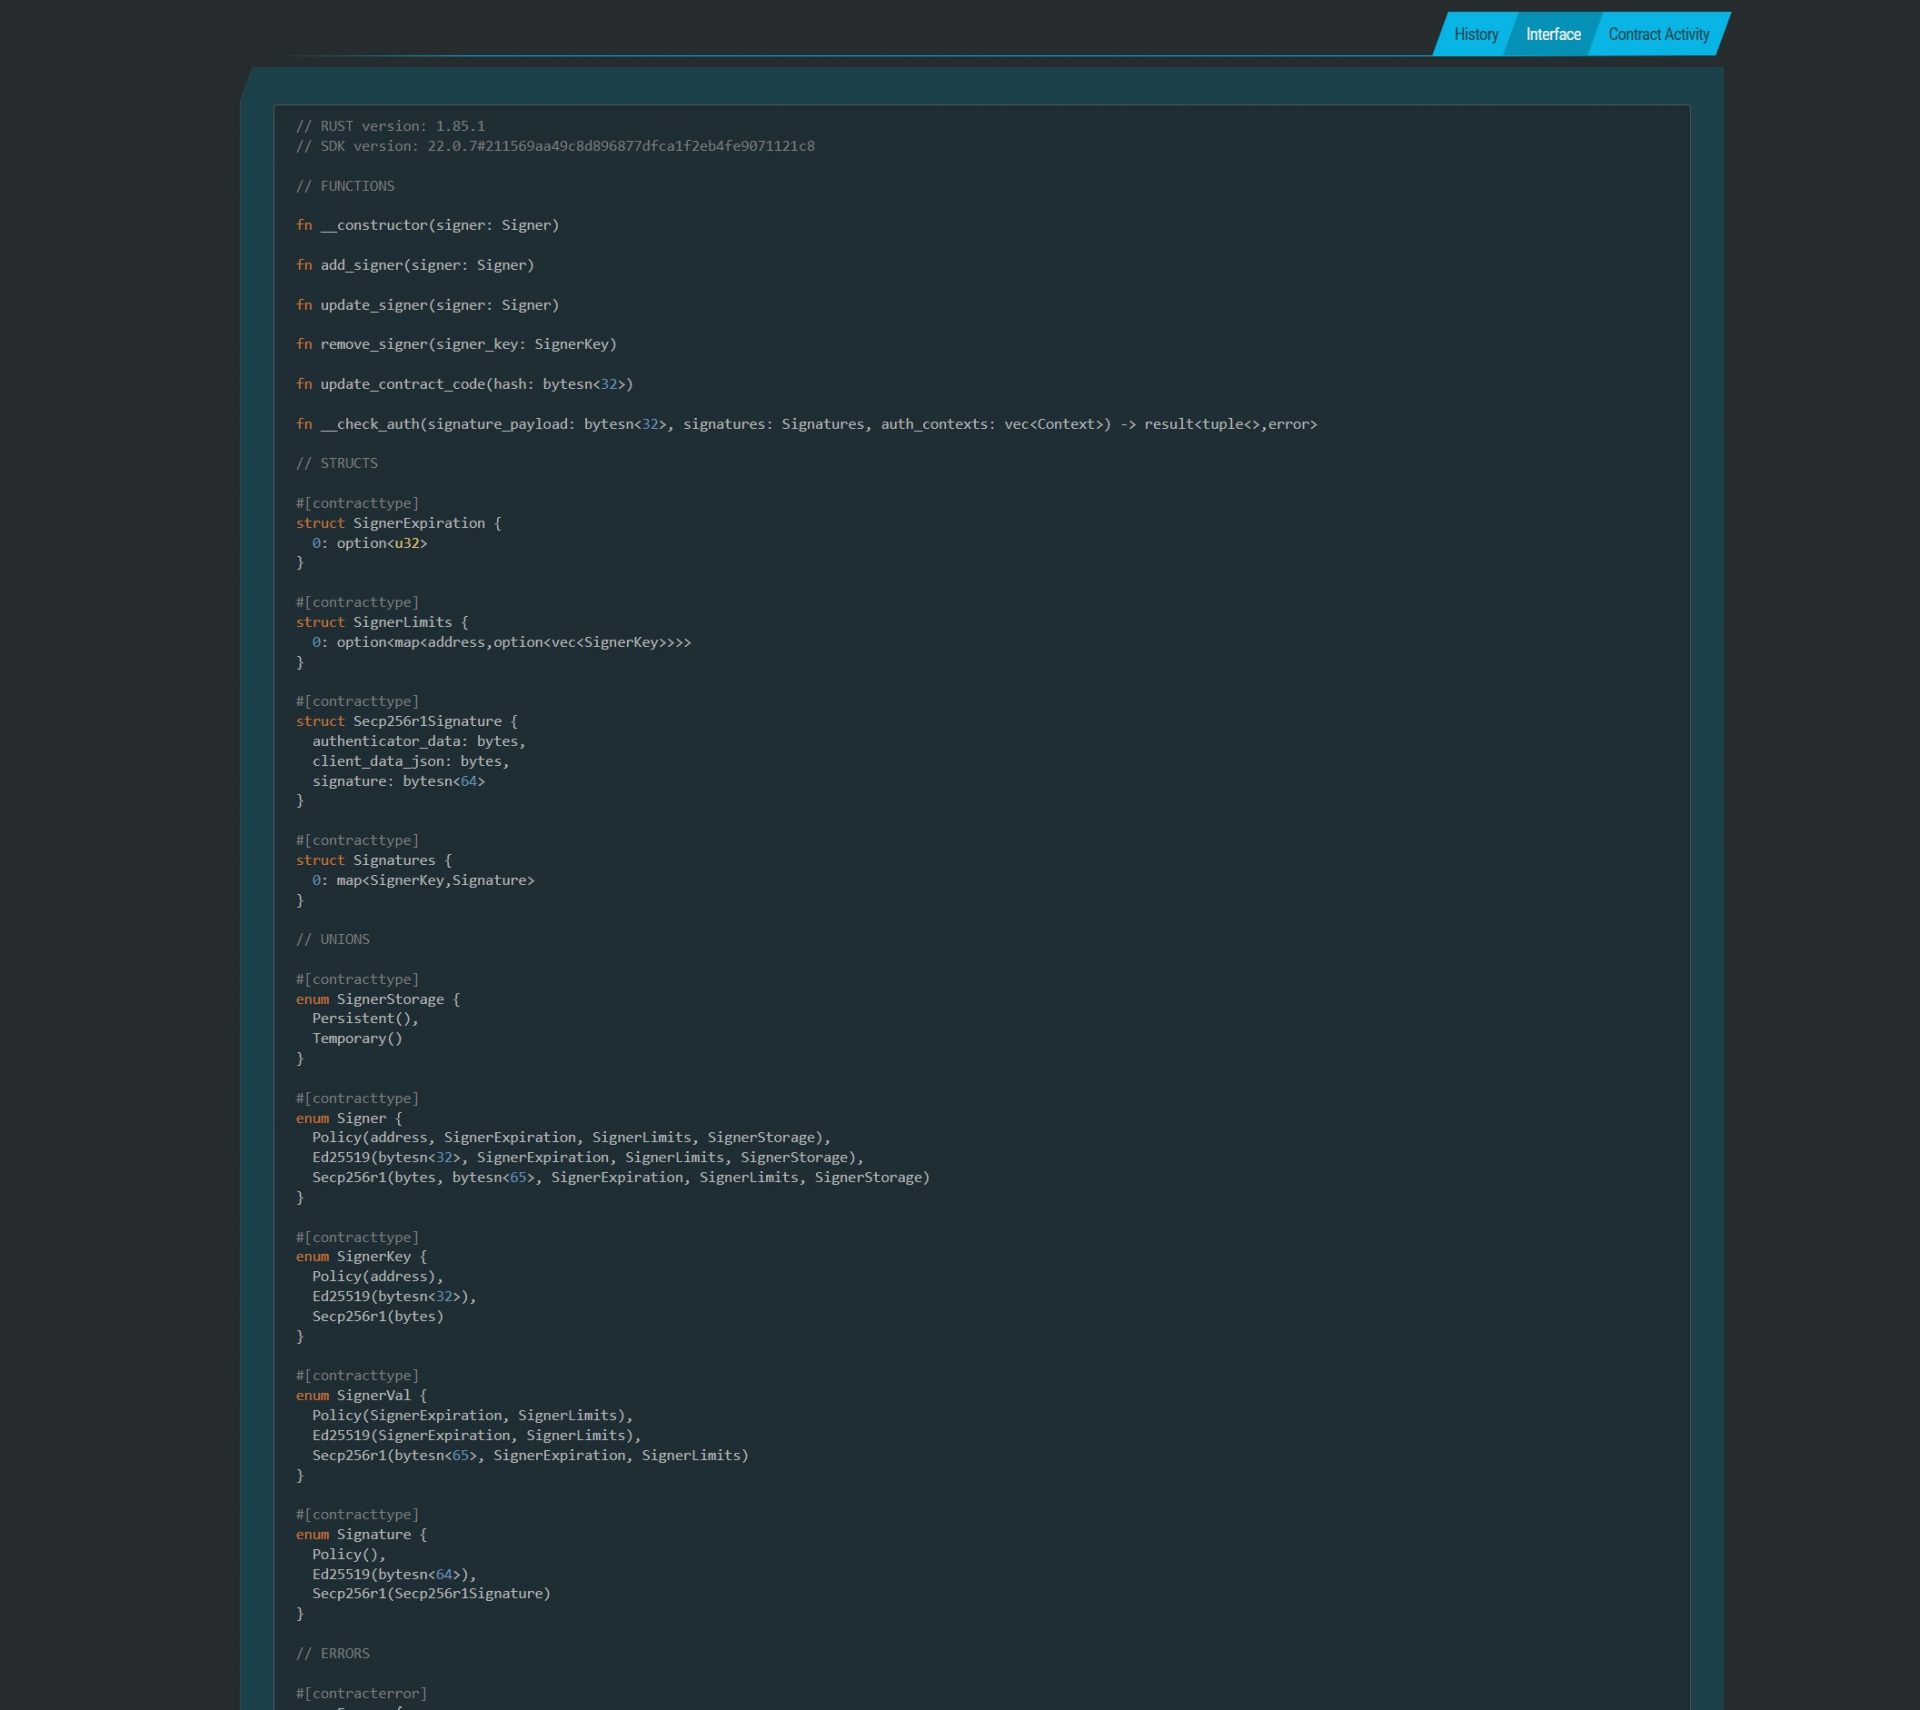
These public functions and data structures are derived from the smart wallet contract at: https://github.com/kalepail/passkey-kit/blob/next/contracts/smart-wallet/src/lib.rs
We could add some custom functions to these contracts. Maybe to enable moderators within the web app.
fn is_mod(env: Env) -> bool {
    env.storage()
        .instance()
        .get::<Symbol, bool>(&symbol_short!("mod"))
        .unwrap_or(false)
}

fn set_mod(env: Env) {
    env.storage()
        .instance()
        .set::<Symbol, bool>(&symbol_short!("mod"), &true);
}
This is a simple example where there’s no restrictions on calling the set_mod function. In production we might want to restrict this function so only an admin account could call it.
One thing to keep in mind here is upgradeability. The user owns their wallet and has the ability to upgrade the logic within it. If you put restrictions in the wallet code and make the contract upgradeable, those restrictions could be removed or changed in the future.
We can then rebuild the contracts, update the SMART_WALLET_FACTORY and SMART_WALLET_WASM values from the make deploy command before running make init.
When you run the make commands make sure you also update line 2 of the Makefile here and set up a new testnet wallet using stellar keys
stellar keys generate james2
stellar keys fund james --network testnet

// Change line2 in Makefile
export STELLAR_ACCOUNT=james2
We can then rebuild the bindings using make bindings
Revert any changes using a git client except for src/index.ts for each package as the bindings have been modified ref. Readme notes.
Restart the web app and we should be able to simulate is_mod and call set_mod from within the app.

Smart wallets are expanding the possibilities for developers on Stellar and represent a significant leap forward in how users interact with blockchain networks, blending programmability with self-custody.
Unlike traditional externally owned accounts, smart wallets are implemented as contracts, meaning they can execute complex logic on behalf of a user. This opens the door for customizable logic all without needing changes to the base protocol.
These contracts can hold token balances, initiate transactions, interact with other contracts, and store data just like any other contract. This opens a pandoras box of opportunities for forward thinking web3 developers.
A smart wallet can own and manage Stellar assets like XLM or USDC, participate in DeFi protocols, and manage on-chain identity credentials. This design makes smart wallets especially powerful where composability and interoperability between contracts are core features.
By embedding logic directly into the account itself, smart wallets blur the line between user and application, making the wallet not just a tool for access, but an active, programmable agent in the on-chain world.
