Dynamic NFTs include logic that evolves the underlying data that the NFT contract holds. In this example we will build a picture profile NFT that is upgradeable to an alien 👽
- Dynamic NFT Smart Contract
- Uploading Artwork To IPFS
- Building A NFT dApp In React
- Ideas For Experimentation
All the source code for this project is available at: https://github.com/jamesbachini/WomenWhoCode
Dynamic NFT Smart Contract
The Solidity smart contracts will comprise of two tokens:
- The ERC721 NFT Contract
- An ERC20 Fungible Token
The user will have to earn enough ERC20 tokens to be able to upgrade their NFT to an alien.
OpenZeppelin has an excellent token wizard on their site which can be used to create the ERC20 NFT
https://www.openzeppelin.com/contracts

We can then open this up in Remix and start building our main NFT contract. The NFT contract will deploy the ERC20 token and hold the entire supply within the contract.
// SPDX-License-Identifier: MIT
pragma solidity >=0.8.17;

import "@openzeppelin/contracts/token/ERC20/ERC20.sol";
import "@openzeppelin/contracts/token/ERC721/ERC721.sol";
import "@openzeppelin/contracts/utils/Base64.sol";

contract Token is ERC20 {
    constructor() ERC20("WomenWhoCode Token", "WWC") {
        _mint(msg.sender, 1_000_000 * 10 ** decimals());
    }
}

contract WomenWhoCode is ERC721 {
    address public tokenAddress;
    uint public tokenId;
    mapping(uint => bool) public isAlien;

    constructor() ERC721("WomenWhoCode NFT", "WWC") {
        Token token = new Token();
        tokenAddress = address(token);
    }

    function earnTokens() public {
        IERC20(tokenAddress).transfer(msg.sender,100e18);
    }

    function mint() public {
        require(tokenId < 1000, "All 1000 tokens have been minted");
        _safeMint(msg.sender, tokenId);
        tokenId = tokenId + 1;
    }

    function makeAlien(uint _tokenId) public {
        uint balance = IERC20(tokenAddress).balanceOf(msg.sender);
        require(balance >= 100e18, "You don't have enough tokens");
        require(ownerOf(_tokenId) ==  msg.sender, "You do not own this NFT");
        isAlien[_tokenId] = true;
    }

    function tokenURI(uint256 _tokenId) override public view returns (string memory) {
        string memory json1 = '{"name": "WomenWhoCode", "description": "A dynamic NFT for WWC", "image": "https://cloudflare-ipfs.com/ipfs/';
        string memory json2;
        // Upload images to IPFS at https://nft.storage
        if (isAlien[_tokenId] == false) json2 = 'bafybeidrcvkt63y4ananxegwleuo43dddt5zhcvtuaiv2bfv2ge7o73ibi"}'; // avatar.png
        if (isAlien[_tokenId] == true) json2 = 'bafybeibyecyp6lxb3p4g27gwsijr5txx72bnfigetwoswhfnrbejla7gcm"}'; // alien.png
        string memory json = string.concat(json1, json2);
        string memory encoded = Base64.encode(bytes(json));
        return string(abi.encodePacked('data:application/json;base64,', encoded));
    }

}
Note we are using the latest string.concat(); function which is only available from solc 0.8.12 so you may need to update your compiler.
earnTokens() – is a public function that lets the user earn the ERC20 tokens. There’s no additional logic here but you could quite easily add complexities of gamification to this.
mint() – is a public function for users to be able to mint a NFT
makeAlien() – is a public function that allows a user to upgrade their NFT to an alien.
tokenURI() – upgrades the default function to parse back base64 encoded JSON data including the image file which is uploaded to IPFS. The output string looks like this:
data:application/json;base64,eyJuYW1lIjogIldvbWVuV2hvQ29kZSIsICJkZXNjcmlwdGlvbiI6ICJBIGR5bmFtaWMgTkZUIGZvciBXV0MiLCAiaW1hZ2UiOiAiaHR0cHM6Ly9jbG91ZGZsYXJlLWlwZnMuY29tL2lwZnMvYmFmeWJlaWRyY3ZrdDYzeTRhbmFueGVnd2xldW80M2RkZHQ1emhjdnR1YWl2MmJmdjJnZTdvNzNpYmkifQ==If you paste that into a web browsers URL bar you’ll see the decoded data as:
{"name": "WomenWhoCode", "description": "A dynamic NFT for WWC", "image": "https://cloudflare-ipfs.com/ipfs/bafybeidrcvkt63y4ananxegwleuo43dddt5zhcvtuaiv2bfv2ge7o73ibi"}Now let’s look at how that image was generated and uploaded to IPFS.
Uploading Artwork To IPFS
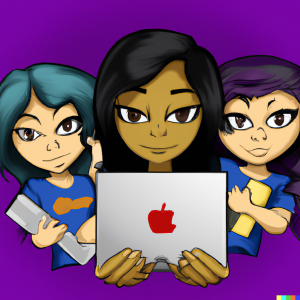
The artwork was designed with more than a little help from OpenAI’s Dall-E.

From there I cut out the main character in GIMP and traced the bitmap in Inkscape.
This created a layered image which needed a bit of tweeking but was ideal for creating variations on a theme. The variation I went for was an alien by simply adjusting the colour of the base skin tone.
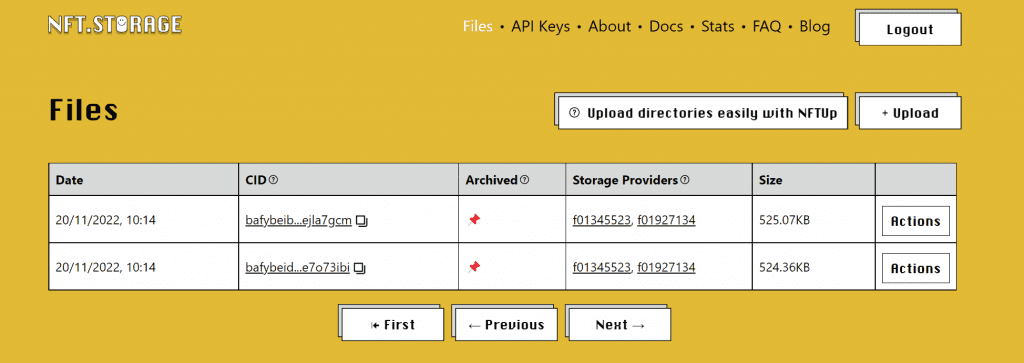
I then used nft.storage to drag and drop these files in to IPFS which is a pseudo-decentralized file system.

Building A Dynamic NFT dApp In React
For the frontend dApp I used react and ethers.js This will require you have Node.js installed.
npm init
npm install -s create-react-app
npm install -s ethers
npx create-react-app frontend
cd frontend
npm start dev
From there we can open up a text editor and start modifying the frontend/src/App.js file
import { useState } from "react";
import './App.css';

import tokenABI from './tokenABI.json';
import nftABI from './nftABI.json';
import { ethers } from "ethers";

let provider, signer, address, token, nft, tokenId;

function App() {
  const [msg, setMsg] = useState('');

  const tokenContractAddress = '0x82cF3a0a631bD601139D89063a0eBc4dA8aC15AF';
  const nftContractAddress = '0xE50366F0534C70D923503142eeB7e298ceD9F06f';

  const connect = async () => {
    provider = new ethers.providers.Web3Provider(window.ethereum);
    await provider.send("eth_requestAccounts", []);
    signer = provider.getSigner();
    token = new ethers.Contract(tokenContractAddress, tokenABI, signer);
    nft = new ethers.Contract(nftContractAddress, nftABI, signer);
    address = await signer.getAddress();
    setMsg(`Connected: ${address}`);
  }

  const mint = async () => {
    const tx = await nft.mint();
    setMsg(`Processing transaction...`);
    await tx.wait();
    tokenId = await nft.tokenId();
    tokenId -= 1; // previous tokenId is ours
    const b64 = await nft.tokenURI(tokenId);
    const json = atob(b64.split(',')[1]);
    const imageURL = JSON.parse(json).image;
    setMsg(`You own WomenWhoCode NFT #${tokenId}`);
    document.getElementById('image').innerHTML = `<img src="${imageURL}" />`;
  }

  const earn = async () => {
    const tx = await nft.earnTokens();
    setMsg(`Sending you some tokens...`);
    await tx.wait();
    const balance = await token.balanceOf(address);
    setMsg(`Your balance is now: ${balance}`);
  }

  const alien = async () => {
    const tx = await nft.makeAlien(tokenId);
    setMsg(`Something strange is happening...`);
    await tx.wait();
    const b64 = await nft.tokenURI(tokenId);
    const json = atob(b64.split(',')[1]);
    const imageURL = JSON.parse(json).image;
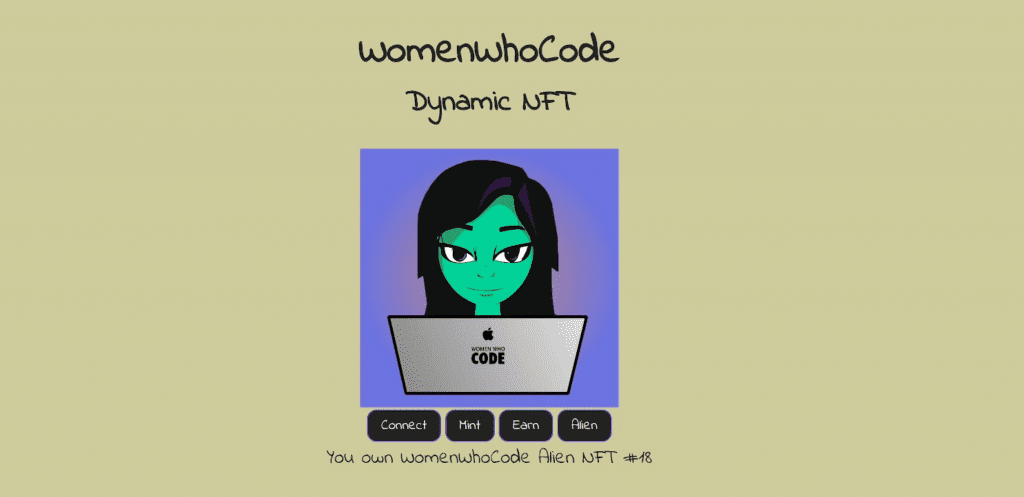
    setMsg(`You own WomenWhoCode Alien NFT #${tokenId}`);
    document.getElementById('image').innerHTML = `<img src="${imageURL}" />`;

  }

  return (
    <div className="App">
      <header className="App-header">
        <h1>WomenWhoCode</h1>
        <h2>Dynamic NFT</h2>
        <div id="image"></div>
        <div id="buttons">
          <button onClick={connect}>Connect</button>
          <button onClick={mint}>Mint</button>
          <button onClick={earn}>Earn</button>
          <button onClick={alien}>Alien</button>
        </div>
        <div id="msg">{msg}</div>
      </header>
    </div>
  );
}

export default App;
This is all pretty standard. Connecting the wallet to Ethers.js and then using the ABI’s from remix to create contract instances for the ERC20 token and ERC721 NFT. We then have buttons to mint an NFT, earn ERC20 tokens and upgrade to an alien.

Ideas For Experimentation
You could definitely take this further in a number of different ways.
- In this contract you only need a balance of ERC20 tokens to upgrade your contract but you could potentially require users to stake assets in the contract to upgrade their NFT so the NFT acts as a vault of digital assets.
- You could use something like Jang.js. to create 10,000 different images from layers and pass through the tokenId to the URL so that every image is unique.
- You could add some form of gamification to make users complete levels to upgrade their NFT or dynamically evolve the character inline with a in-game story.
- You could change the isAlien variable to isJamesExGf
I hope this walkthrough and demo has been of interest. Thank you to WomenWhoCode for inviting me to do the workshop for their community. All the code is on Github and bare in mind that it is for demonstration purposes and none of it has been tested in the wild.


