This Solana tutorial goes through a step by step process of setting up a development environment for Solana, writing and deploying smart contracts and my experiences with entering the Solana Hackathon.
- Getting Started With Solana
- Solana Tutorial [Video]
- Set Up A Solana Development Environment
- Writing A Smart Contract In Rust
- Deploying A Contract With NodeJS
- The Solana JSON Library
- Solana & Serum Hackathon
- Conclusion
Getting Started With Solana
Solana is a high performance modern blockchain with impressive throughput capabilities. It can handle 50,000 transactions per second which makes it scalable and fast enough to enable a new era of decentralised applications (dApps).

Solana was built as part of the Alameda group of products which are all intertwined with FTX, Serum, Bonfida & Raydium. It has the backing of the worlds largest cryptocurrency prop trader in Alameda and a hugely profitable enterprise in FTX. Sam Bankman-Fried the Founder and CEO is a legend of the industry and a true role model for his contributions to effective altruism.
So why use Solana, let’s look at some pros and cons
| Pros | Cons |
|---|---|
| Fast confirmation times (0.4 second blocks) | Not Ethereum virtual machine compatible |
| Scalable to 50k tps | Requires smart contract to be coded in Rust or C |
| Low cost transactions (opportunity to grow due to Ethereum gas fees) | Undeveloped ecosystem in terms of DeFi building blocks, auditors etc. |
| Early stage opportunities to grow with the network | Limited decentralisation at present. Proof of history consensus mechanism |
| Built in programs for common tasks | Quite different to developing smart contracts in Solidity. |
| JSON RPC & Web3 like Javascript interfaces |
In the next sections I’ll go through a brief video solana tutorial for developing smart contracts followed by some detailed notes on how to setup a dev environment, write smart contract code in Rust, deploy to the network and finally how I got on at the Solana hackathon.
Solana Tutorial [Video]

Set Up A Solana Development Environment
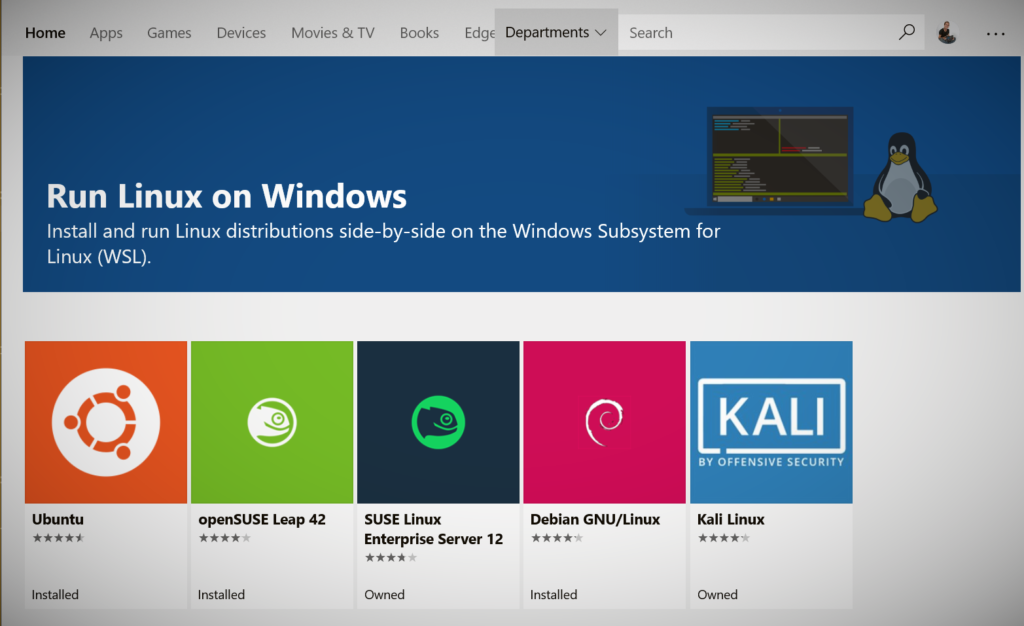
I was never able to get the smart contract code to compile when running it directly from a Windows machine. For that reason I settled on setting up a WSL (Windows Subsystem For Linux) Ubuntu version so that I could write the code in Windows and then just use a linux command line to compile the Rust smart contract to a .so file.
If you don’t have WSL set up already it’s a great tool and there are detailed instructions and a download link here:
https://docs.microsoft.com/en-us/windows/wsl/install-win10

Once installed I setup nodejs, npm, python, rust and the solana sdk.
Here are the commands:
apt upgrade
apt update
apt install nodejs
apt install npm
apt install python3-pip
curl --proto '=https' --tlsv1.2 -sSf https://sh.rustup.rs | sh
sh -c "$(curl -sSfL https://release.solana.com/v1.5.7/install)"
source $HOME/.cargo/env
export PATH="/root/.local/share/solana/install/active_release/bin:$PATH"
export RUST_LOG=solana_runtime::system_instruction_processor=trace,solana_runtime::message_processor=debug,solana_bpf_loader=debug,solana_rbpf=debug
solana-test-validator --log
Once setup we can test it by running a simple hello world application
git clone https://github.com/solana-labs/example-helloworld.git
cd example-helloworld/
npm install
npm run build:program-rust
The final thing I’d recommend is installing the Rust extension for VSCode or whatever editor you are using.
So the basic workflow is develop a smart contract in Rust > Compile with Cargo > Deploy using NodeJS
Writing A Smart Contract In Rust
Developing a smart contract on Solana is very different to using Solidity on Ethereum. It’s a unique blockchain which requires developers to carry out more memory management and low level work and planning. The first step is to understand how the Solana smart contracts work.
How Solana Smart Contracts Work
A Solana smart contract is read-only or stateless. Once deployed it can be interacted with by 3rd party accounts that can store fixed amounts of data.
In practice this means we deploy the smart contract code and get a public key for where that code is stored. A second account can then be created with a fixed and limited amount of disk space specifically to interact with that smart contract. So you would have one public key for the code (known as a programId) then another for the appAccount.
On the back end, the code is compiled using LLVM to a ELF file which has a specific bytecode as it’s target.
Memory Management On Solana
The appAccount must have a fixed amount of memory to interact with the smart contract. This space must be paid for in SOL when the account is created.
When developing a smart contract you need to figure out what data your contract needs to store and how to store it. I found that numerical data as in integers and floats is a lot easier than strings to store.
So one u32 integar is 4 bytes as there are 8 bits to a byte. Lets say we want to store two numerical values as integars in the smart contract. We would need to allocate 8 bytes of storage space and then map out the first four bytes is an integar for x and the second four bytes is an integar for y.
Sound complicated and not a lot of fun? Correct.
First Solana Smart Contract
I’d recommend taking a look at some of the example code provided by Solana labs here: https://github.com/solana-labs
There’s a good introduction to coding with Rust here: https://www.rust-lang.org/learn
Read everything and refer back to the Solana developer documentation here: https://docs.solana.com/developing/programming-model/overview
Let’s start with the hello world example and disect what each part does. The full code can be found at: https://github.com/solana-labs/example-helloworld/blob/master/src/program-rust/src/lib.rs
use byteorder::{ByteOrder, LittleEndian};
use solana_program::{
    account_info::{next_account_info, AccountInfo},
    entrypoint,
    entrypoint::ProgramResult,
    msg,
    program_error::ProgramError,
    pubkey::Pubkey,
};
use std::mem;

entrypoint!(process_instruction);
We start by doing some standard includes and declaring an entry point which will be the process_instruction function.
fn process_instruction(
    program_id: &Pubkey,
    accounts: &[AccountInfo],
    _instruction_data: &[u8],
The program_id is the public key where the contract is stored and the accountInfo is the appAccount to say hello to.
) -> ProgramResult {
    msg!("Helloworld Rust program entrypoint");
    let accounts_iter = &mut accounts.iter();
    let account = next_account_info(accounts_iter)?;
The ProgramResult is where the magic happens and we start by printing a fairly pointless message and then select the accountInfo by looping through although in practice there is likely only one.
if account.owner != program_id {
  msg!("Greeted account does not have the correct program id");
  return Err(ProgramError::IncorrectProgramId);
}
Security check to see if the account owner has permission.
if account.try_data_len()? < mem::size_of::<u32>() {
  msg!("Greeted account data length too small for u32");
  return Err(ProgramError::InvalidAccountData);
}
Check to see if data is available to store a u32 integar.
let mut data = account.try_borrow_mut_data()?;
let mut num_greets = LittleEndian::read_u32(&data);
num_greets += 1;
LittleEndian::write_u32(&mut data[0..], num_greets);
msg!("Hello!");
Ok(())
Finally we get to the good stuff where we “borrow” the existing appAccount data, increase that value by one and rewrite it back. Then last of course it outputs another fairly pointless “Hello” message.
So the program increments the number stored in accountInfo.data.num_greets by one each time it is run.
We could easily use a simple nodeJS function and the solana web3 library to check the accounts data and find the value of num_greets at any point without requiring any interaction with the smart contract. This could be done using front end code for example.
Using this and the other example code sources as a base you will be able to create custom contracts to meet the requirements of any decentralised application.
Deploying A Contract With NodeJS
You can deploy contracts via the command line but I found it much easier to have a script which takes a compiled .so file and deploys it.
I used NodeJS and the @solana/web3.js module for this. Some example code with methods for each stage can be found at: https://github.com/jamesbachini/Solana-JSON/blob/main/solana-json.js
const connection = new solanaWeb3.Connection('https://testnet.solana.com');

const payerAccount = new solanaWeb3.Account();

const res = await connection.requestAirdrop(payerAccount.publicKey, 1000000000);
So the first step is to setup a connection to the testnet. Create a user which will be used to pay for all the transactions. Then we will use the requestAirdrop function to request 1 SOL (1000000000 Lamports). Because it’s the testnet we will get some SOL tokens deposited to our account.
To deploy a contract on mainnet we would purchase some SOL tokens from FTX and then send them to a Sollet.io account. The private key could be exported from there and imported as a buffer array like so.
const payerAccount = new solanaWeb3.Account([1,185,72,49,215,81,171,50,85,54,122,53,24,248,3,221,42,85,82,43,128,80,215,127,68,99,172,141,116,237,232,85,185,31,141,73,173,222,173,174,4,212,0,104,157,80,63,147,21,81,140,201,113,76,156,161,154,92,70,67,163,52,219,72]);So we have a private key / public key pair for an account with some funds. The next step is to upload the smart contract code to a separate account.
const data = await fs.readFile('./directory/file.so');
const programAccount = new solanaWeb3.Account();
await solanaWeb3.BpfLoader.load(
  connection,
  payerAccount,
  programAccount,
  data,
  solanaWeb3.BPF_LOADER_PROGRAM_ID,
);
const programId = programAccount.publicKey;
console.log('Program loaded to account', programId.toBase58());
We read the file.so that we created using linux to compile our rust smart contract. This is usually in ./target/deploy/whatever.so
We create another account for the programAccount and load the code, paying for the transaction and storage costs using the payerAccount we previously set up.
Finally we print out the base58 version of the programId which is just the public key of the programAccount. The next step is to create a 3rd account for the app itself which will store any data required for the dApp.
const appAccount = new solanaWeb3.Account();
const appPubkey = appAccount.publicKey;
console.log('Creating app account', appPubkey.toBase58());
const space = smartContract.dataLayout.span;
const lamports = 5000000000;
const transaction = new solanaWeb3.Transaction().add(
  solanaWeb3.SystemProgram.createAccount({
    fromPubkey: payerAccount.publicKey,
    newAccountPubkey: appPubkey,
    lamports,
    space,
    programId,
  }),
);
await solanaWeb3.sendAndConfirmTransaction(
  connection,
  transaction,
  [payerAccount, appAccount],
  {
    commitment: 'singleGossip',
    preflightCommitment: 'singleGossip',
  },
);
One quirk here is that we have to specify how much space is required for data when setting up the account. I used the buffer-layout module to map and calculate this for the space variable. For simple contracts this probably isn’t necessary.
Note that this space is rented not purchased and the appAccount will need some SOL to pay the rental fees.
const buffer = Buffer.from('hello solana', 'utf8');
const instruction = new solanaWeb3.TransactionInstruction({
  keys: [{pubkey: app.appAccount.publicKey, isSigner: false, isWritable: true}],
  programId: app.programId,
  data: buffer,
});
const confirmation = await solanaWeb3.sendAndConfirmTransaction(
  connection,
  new solanaWeb3.Transaction().add(instruction),
  [payerAccount],
  {
    commitment: 'singleGossip',
    preflightCommitment: 'singleGossip',
  },
);
Finally we are going to interact with our smart contract by sending it some data. The code above creates a buffer from a string. Puts this into an instruction which is then sent using the sendAndConfirmTransaction function. This is sent from the original payerAccount which hopefully still has some funds left.
The Solana JSON Library
To make this whole process easier and more accessible for front end developers I put together a library and smart contract for storing JSON data on the Solana blockchain.
This should really only be used as example code for what is possible as it comes with some serious limitations.
- There are no security checks so anyone can modify the data.
- It’s limited to 996 characters of JSON data.
- It’s not optimal from a performance or cost perspective.
Here is the npm module: https://www.npmjs.com/package/solana-json
The code is pretty simple to get running:-
const solanaJSON = require('./solana-json.js');

(async() => {
  const connection = solanaJSON.setupConnection('https://testnet.solana.com');
  const payerAccount = await solanaJSON.createUser();
  await solanaJSON.fundUser(connection,payerAccount);
  const smartContract = {
    pathToProgram: './solana-json.so',
    dataLayout: solanaJSON.setDataStructure(1000),
  }
  const app = await solanaJSON.loadProgram(connection,smartContract,payerAccount);
  console.log('app',app);
  const confirmationTicket = await solanaJSON.pushJSON(connection,app,'{"abc":123}');
  const testJSON = solanaJSON.pullJSON(connection,app.appAccount.publicKey);
  console.log(`Test: ${JSON.parse(testJSON).abc}`);
})()
If you want to add the security check we looked at earlier or modify the data limits you’ll need to edit the ./solana-json.rs rust code and then recompile it. Adjusting the solanaJSON.setDataStructure(1000) alone wont work as the data is mapped out in the smart contract.
I hope this helps people get started with Solana. It took me two days to figure out how to store a string in the blockchain so hopefully this will accelerate someone’s dev time and provide a small contribution to the Solana ecosystem.
If anyone wants to develop the code base further feel free to do a pull request on the Github repository: https://github.com/jamesbachini/Solana-JSON
Solana & Serum Hackathon

As you can probably tell most of my work was on the back end trying to create a way to store data on Solana to create a decentralised data store.
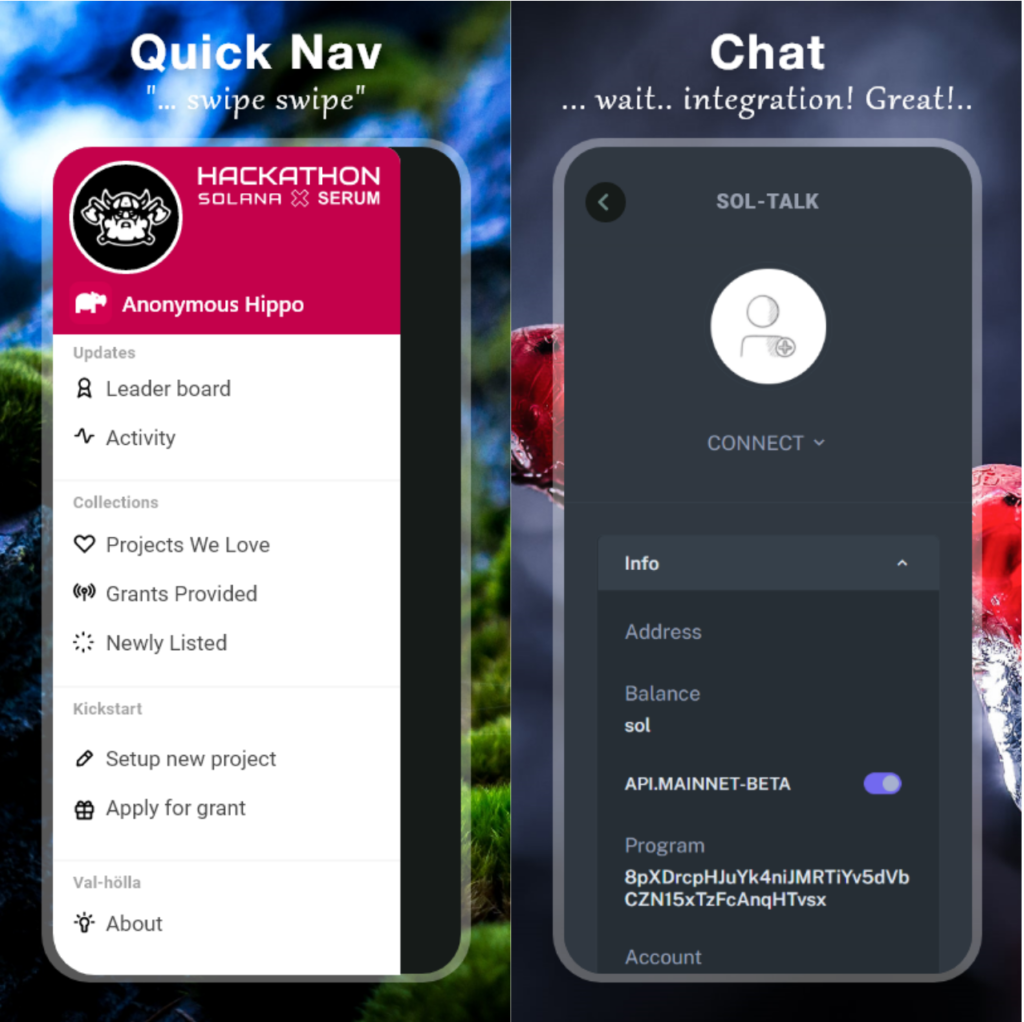
The application we want to build will act as an entry point to the Solana ecosystem. Much like DeFiPulse does for Ethereum and DeFiStation does for BinanceSmartChain.
We would rank projects by total value locked and provide stats on the entire Solana ecosystem. There would then be Kickstarter type funding projects for new ideas and community discussion tools.

The limited amount of data that we could store on Solana meant that we needed another way to decentralise the application. We settled on IPFS as a method for storing larger volumes of data that it wouldn’t have been feasible to store on the Solana blockchain.
The source code for the project can be found at: https://github.com/JohnRSim/valholla/
Conclusion
After working with Solana the last couple of weeks I feel I’ve just about got to grips with how the blockchain operates. It is very different to what I’m used to doing and the low level data management was a challenge. If you are more used to scripting and front end work then learning Solana will make you a better, more rounded programmer.
Solana has a bright future as it’s well funded and in a good place to benefit from the gas fee and congestion issues on Ethereum’s network. Binance Smart Chain has taken the limelight but Solana’s ecosystem will grow in to a usable DeFi space as well. It will take longer to reach maturity because Solana is not EVM compatible and devs can’t just fork Ethereum code.
I certainly wouldn’t bet against Sam and the Alameda group making a success of this. At the moment the Solana/Serum ecosystem lacks the full polished components and platforms of a developed DeFi ecosystem to make it appealing to a mainstream degen audience but this is being built as we speak and will only grow over time.
Developing on Solana now provides the opportunity to grow a project with the network.


