
WAGMI is a set of Typescript React hooks for web3 which enables developers to connect to smart contracts on blockchain networks. In this tutorial we will look at how to install and setup a boilerplate in WAGMI and then build a simple read query.
WAGMI in 3 Mins [Video]

How To Set Up WAGMI
You’ll need NodeJS installed from here: https://nodejs.org
Then let’s run the following commands in a new directory:
npm i wagmi viem
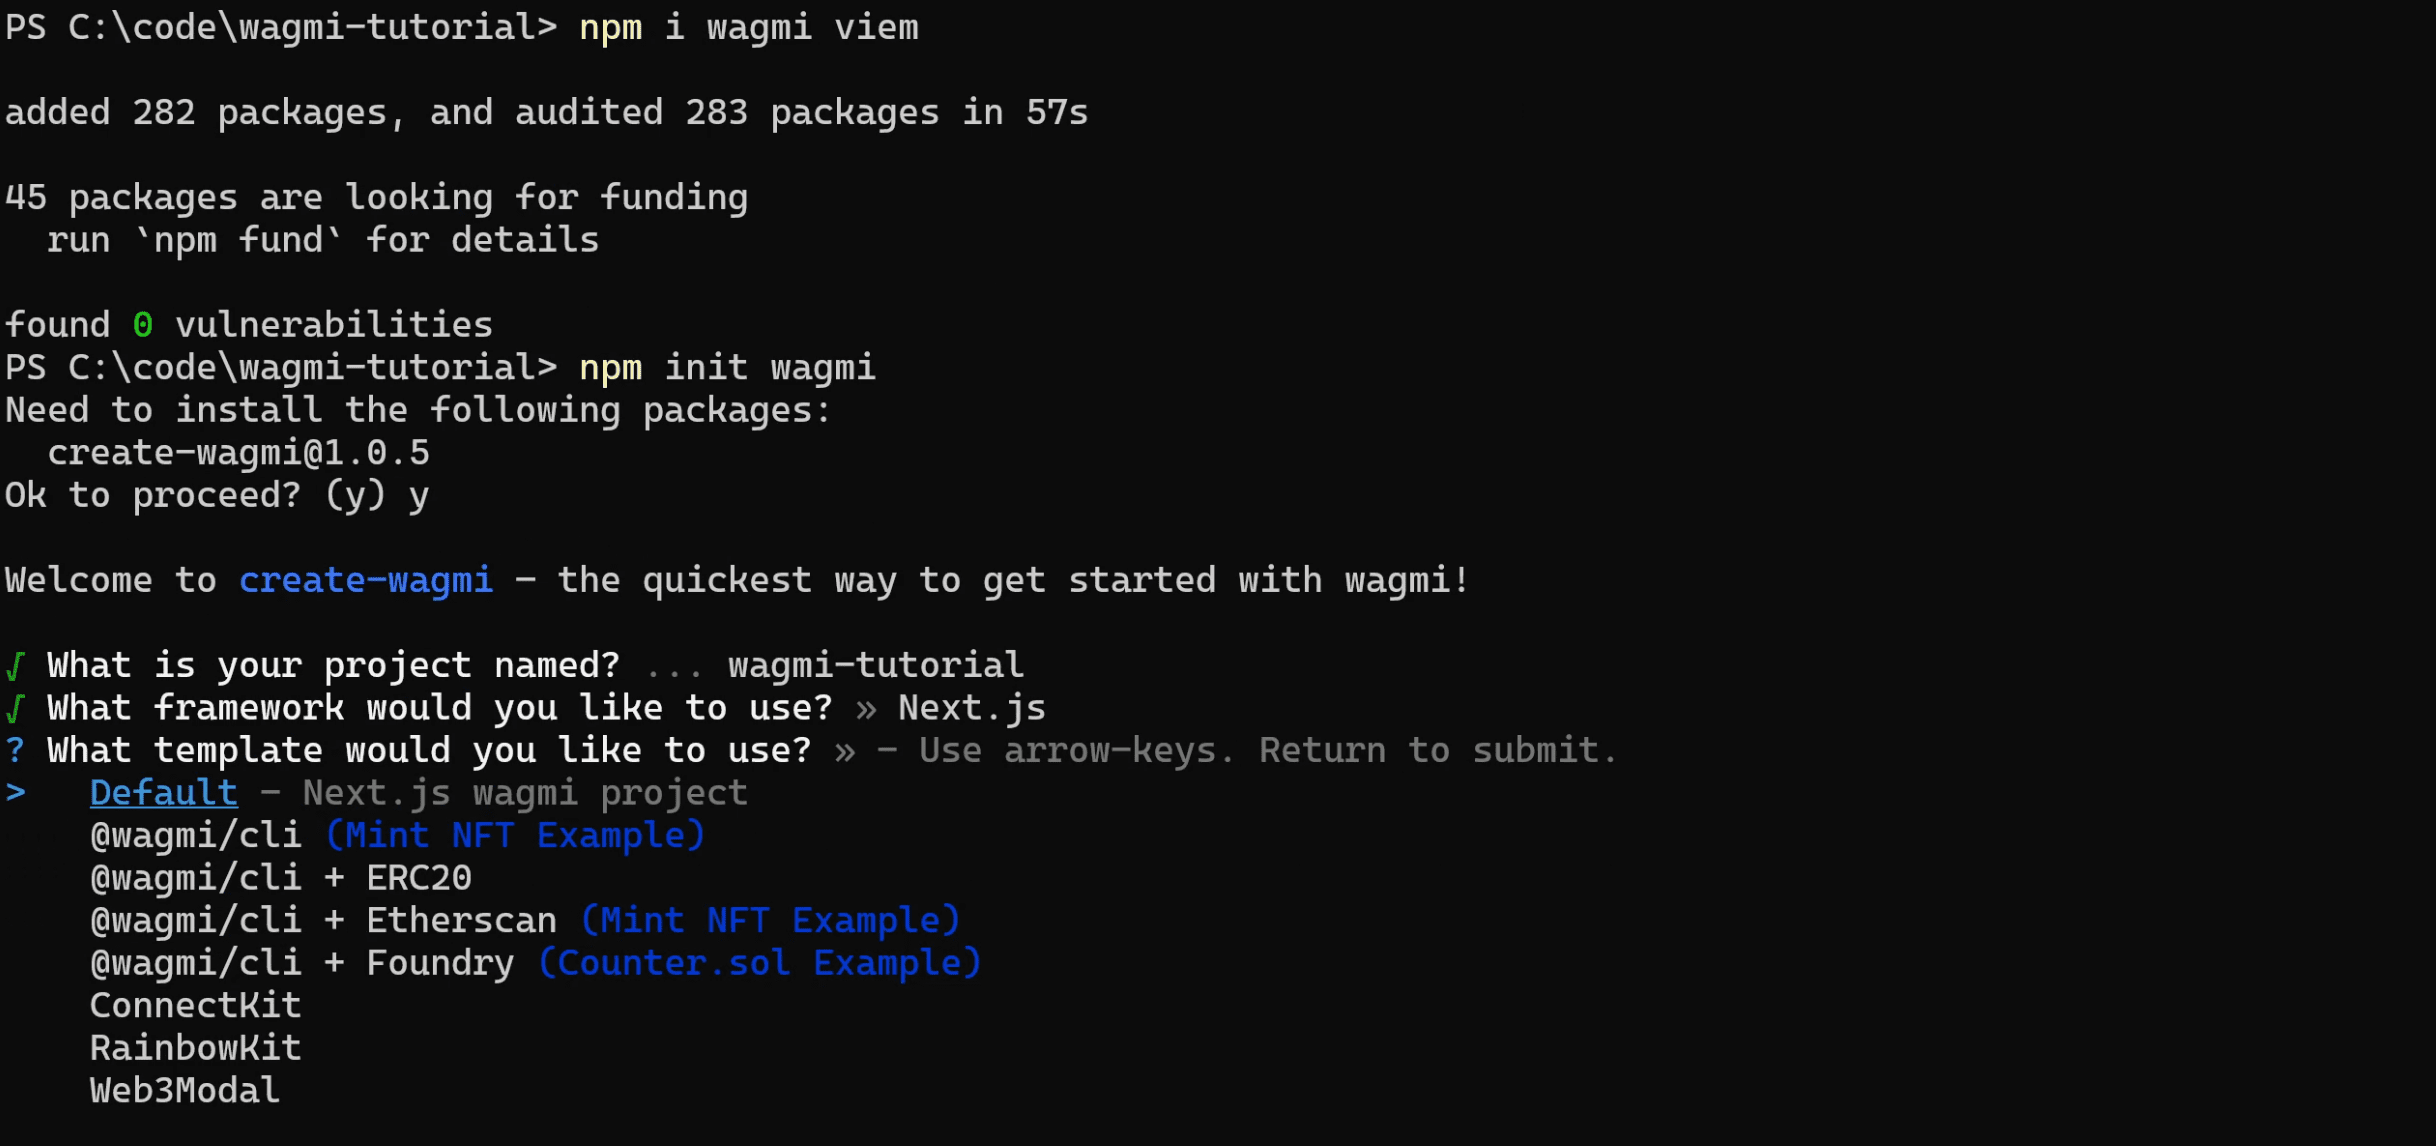
npm init wagmiYou’ll get a set of options to create a boilerplate for your project. In this example we will be using the Mint NFT Example
Once completed we can move into the new project directory and set up a live coding environment.
cd project-name
npm run dev
Building With WAGMI
What we can then do is right click and open in our code editor of choice, here I’m using vs code. Open up the editor and the URL http://localhost:3000 in a browser and when you make changes to the code they’ll be instantly updated in the browser.
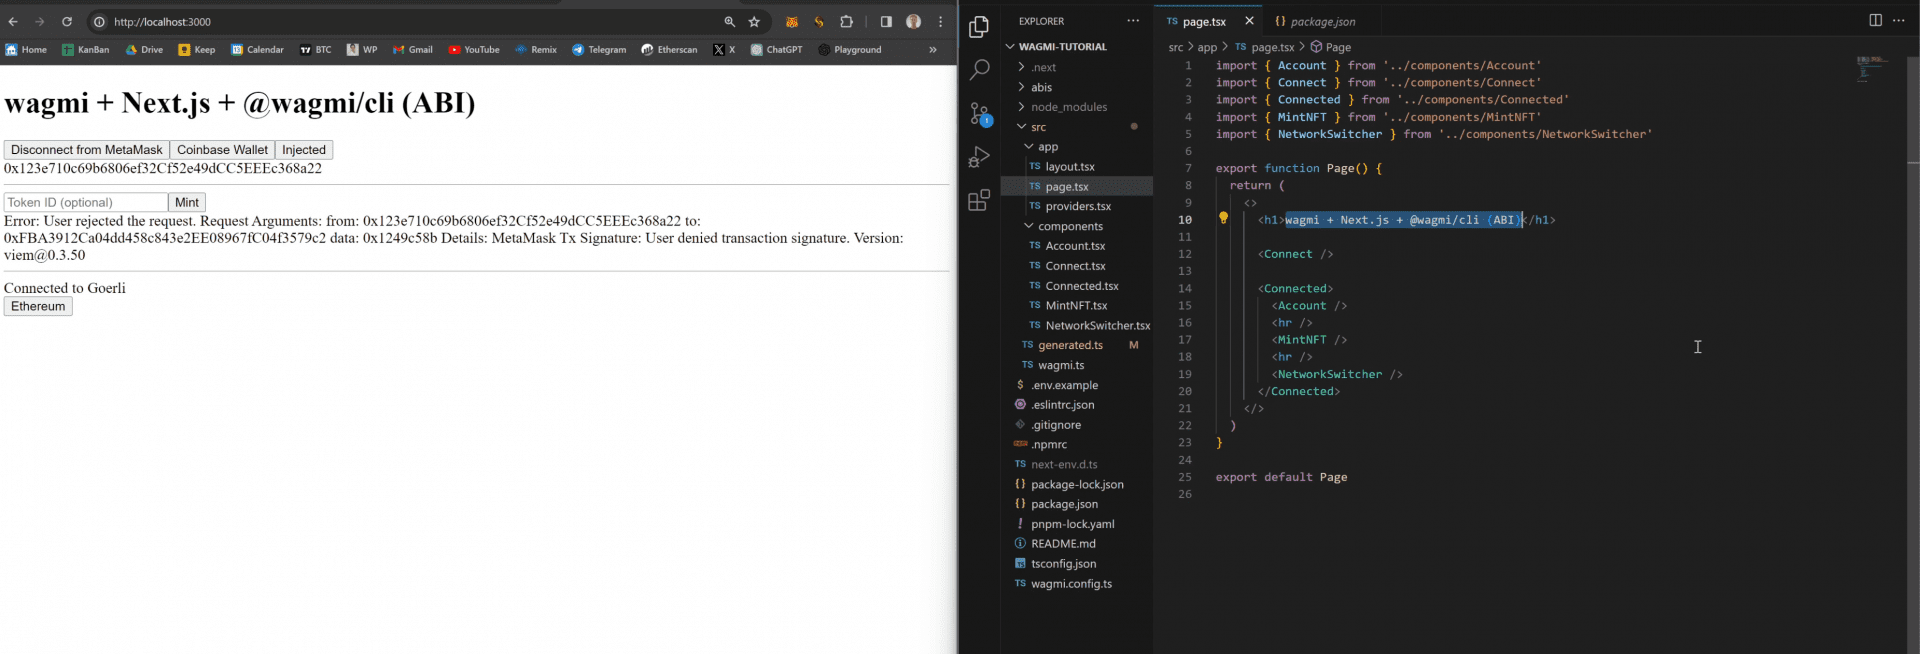
If we start by opening up app/page.tsx we can change the text in the h1 tag to modify the page title.
From there we can go on to stylize the site or connect in other React/NextJS elements as the design requires.
Creating A WAGMI Component
Let’s add a new component to page.tsx, add in a new import and place it somewhere in the returned HTML:
import { NameNFT } from '../components/NameNFT'

... then in the return( section add the following:

<NameNFT />
We may get some errors initially because we haven’t created the component yet. So let’s go into ../components/ and create a new file called NameNFT.tsx
Code is available here: https://github.com/jamesbachini/wagmi-tutorial/blob/main/wagmi-tutorial/src/components/NameNFT.tsx
'use client'
import { useContractRead } from 'wagmi'
import { wagmiMintExampleABI } from '../generated'

export function NameNFT() {
  const {data:Name} = useContractRead({
    address:"0xfba3912ca04dd458c843e2ee08967fc04f3579c2",
    abi:wagmiMintExampleABI,
    functionName:"name",
    watch: false
  });

  return (
    <div>
      {Name}
    </div>
  )
}
So the first two lines import the useContractRead function from wagmi and an ABI (application binary interface) which is specific to the smart contract we are interacting with. The ABI acts like an instruction set for the smart contract and describes the function names, inputs and outputs that we can use. Fortunately we already have an ABI for this particular example contract in the ../generated.ts file so we will use that.
Next we care going to export the main NameNFT component and create a const value called Name. This will use the useContractRead WAGMI function to read the “name” function from the smart contract.
We pass in the address, abi, functionName and a boolean for watch which will update on changes.
Finally from within the NameNFT component function we return the formatted HTML with the {Name} variable inserted.
This will inject the Name of the NFT contract or any other onchain data you require into the web page.
To export our final code we can run the following command which will build the final project.
npm run build