
We are going on a journey to seamlessly integrate session keys into a web3 dApp, striking a balance between autonomy and ease of use that your users are yearning for.
The goal is to enable users to authenticate with a digital wallet and store a session key on their device. This session key will provide access to the backend API with private persistent storage on the centralized server.

What Are Web3 Session Keys?
Web3 session keys represent a compromise in decentralized technology, serving as temporary, programmable credentials that dApp users can leverage to authenticate with backend services without the need for repetitive wallet authentications. These keys act as limited-permission proxies for the user’s primary account, enabling a series of transactions to be executed with ease and fluidity, reminiscent of the seamless interactions users enjoy in traditional web applications.
Smart contracts store data on open transparent p2p networks which is amazing for certain uses but for anything that requires any level of privacy it’s not ideal. In the future we may see solutions like zero knowledge proofs play a bigger role in creating private on-chain data storage systems but in the meantime we can store private data off-chain and make it available via web3 wallet authentication.

Session keys are a component of the broader movement towards account abstraction, a transformative idea to enhance Ethereum’s user experience. Unlike the traditional account model that Ethereum employs, which requires explicit signatures for every transaction, account abstraction allows users to define conditions under which transactions can be automatically approved and executed.
In the example below we are using session keys to authenticate with a centralized backend. This can be expanded upon to create a rules based smart contract which users can grant permission to like a smart wallet with pre-defined rules and functions.
The implications for user experience are profound. Gamers can play blockchain based games without interruption, traders can execute multiple trades without signing each one, and the average user can interact with smart contracts in a much more intuitive way.
Web3 Session Frontend
The frontend code is available here:
https://github.com/jamesbachini/Web3-Session-Keys/blob/main/frontend.html
I’m going to pull out some snippets to discuss.
const signer = await provider.getSigner();
const fromAddress = await signer.getAddress();
localStorage.fromAddress = fromAddress;
const nonce = Math.random().toString();
const siteID = 'Web3 Session Key Demo';
const signature = await signer.signMessage(`I am proving ownership of this address: ${nonce} ${siteID}`);
Here we are using ethers.js to initialize a signer instance with the users digital wallet. We store the users fromAddress in localStorage to be used later. We then create a random nonce value and a unique siteID. We then request the users signs our custom message string.
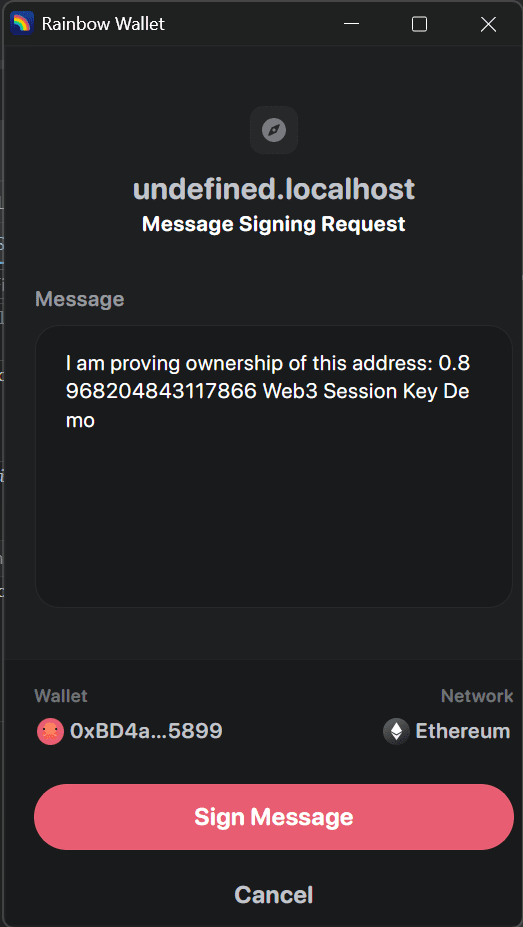
This will spawn Metamask or whatever plugin you are using to pop up a message like the one shown in the web3 session key demo.
const response = await fetch(apiEndpoint, {
  method: 'POST',
  headers: {
    'Content-Type': 'application/json',
  },
  body: JSON.stringify({ fromAddress: localStorage.fromAddress, sessionKey: localStorage.sessionKey }),
});
Then whenever we want to interact with the backend API we authenticate with the users ethereum address and session key passing it through as JSON in a POST request.
Web3 Session Backend
The backend is setup using NodeJS, express and ethers. The full source code is available here:
https://github.com/jamesbachini/Web3-Session-Keys/blob/main/backend.js
The first thing we need to do is authenticate the signature.
const message = `I am proving ownership of this address: ${nonce} ${siteID}`;
const recoveredAddress = ethers.verifyMessage(message, signature);
We are using the ethers.js verifyMessage function here. Note that I’m using the latest version 6 of ethers.js which has breaking changes over v5.
Then whenever we want to verify a query we can check the session key.
app.post('/getName', (req, res) => {
  const { fromAddress, sessionKey } = req.body;
  if (users[fromAddress] && users[fromAddress].sessionKey == sessionKey) {
    console.log(`Name returned: ${users[fromAddress].name}`);
    res.json({ isValid: true, name: users[fromAddress].name });
  } else {
    res.status(401).json({ isValid: false, error: "Invalid session key." });
  }
});
Here we are taking the fromAddress and sessionKey from req.body which is passed in from the frontend query. If the user exists in the users object and the sessionKey is correct we go on to complete the function returning JSON data to the frontend.
Web3 Session Key Demo
To set this up locally fork the repository at:
https://github.com/jamesbachini/Web3-Session-Keys
Then open a terminal in the directory and run the following commands
npm install
node ./backend.js
Open a web browser on http://localhost:3000 and you should see the following frontend.
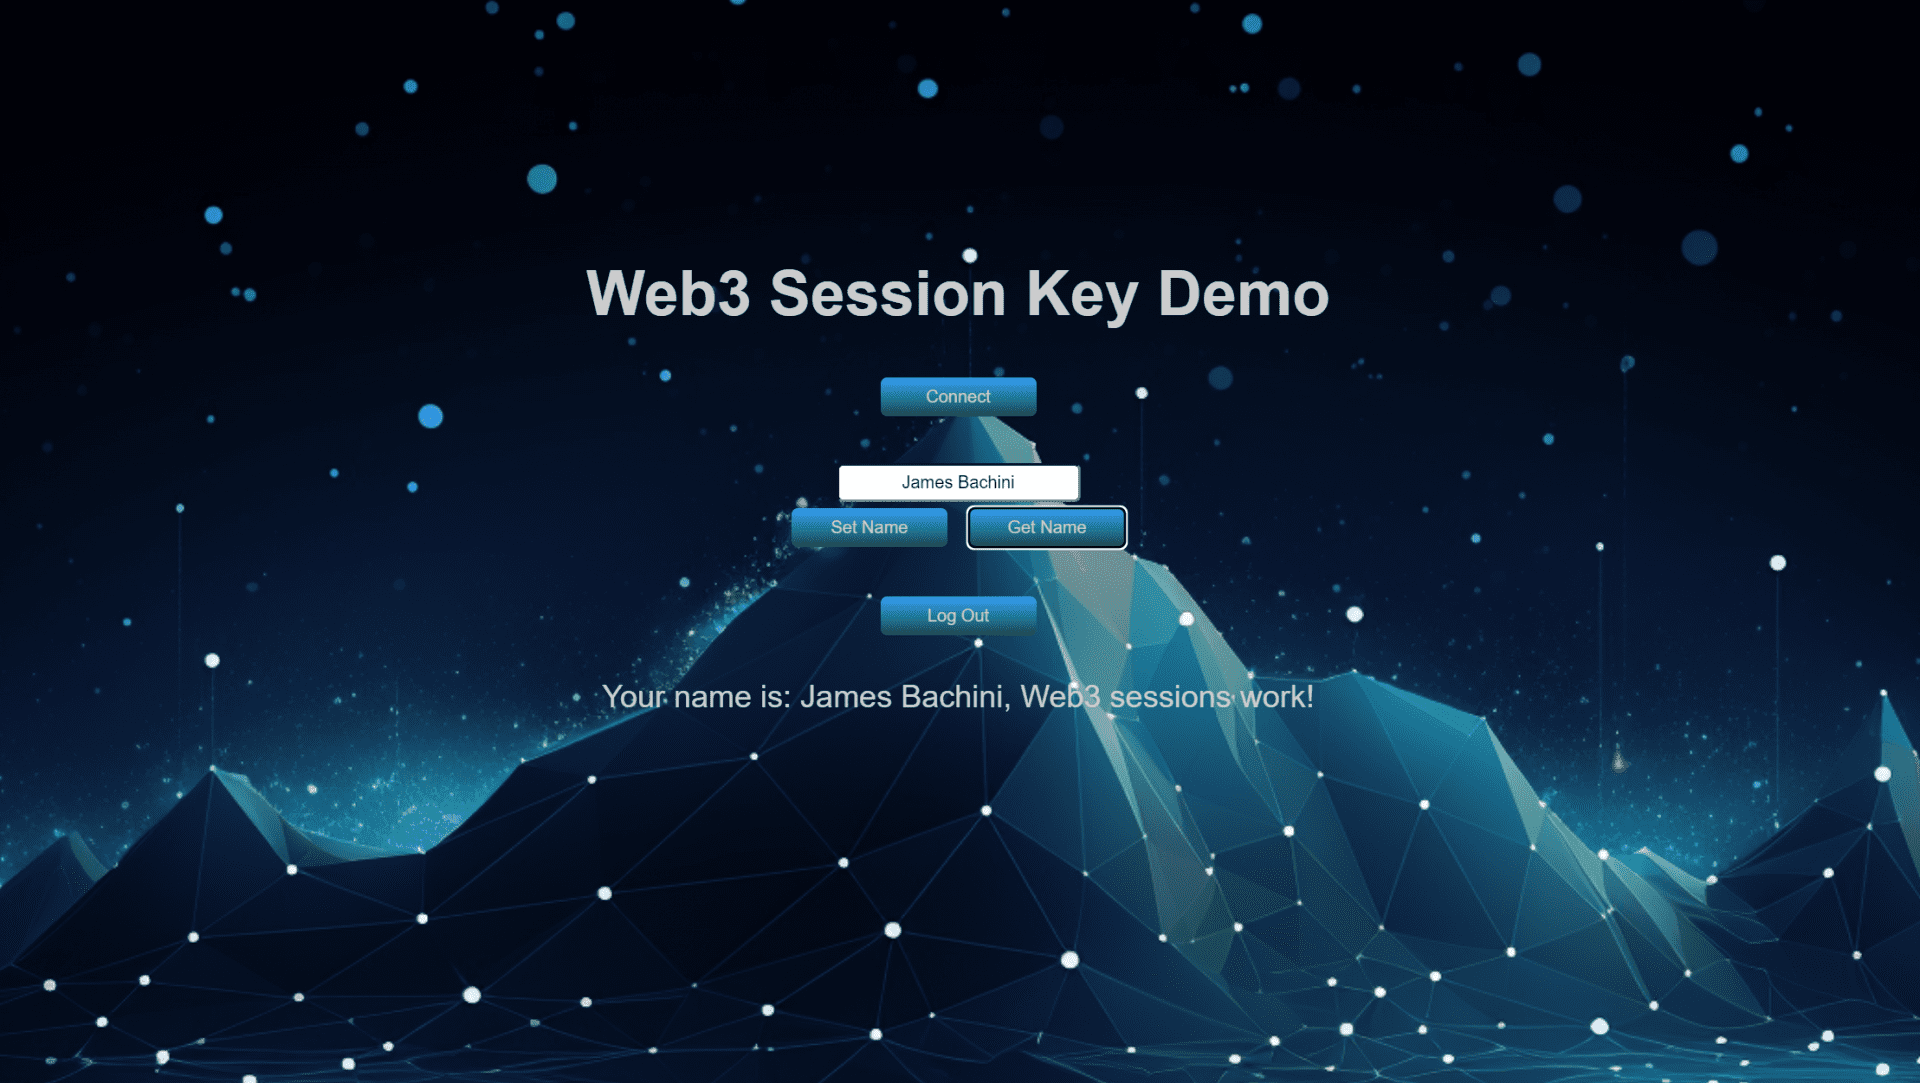
We can use this to authenticate with our wallet, store a name value and retrieve it from persistent private storage.
Here is what the signature request looks like in a digital wallet. The message can be customized to your individual branding.
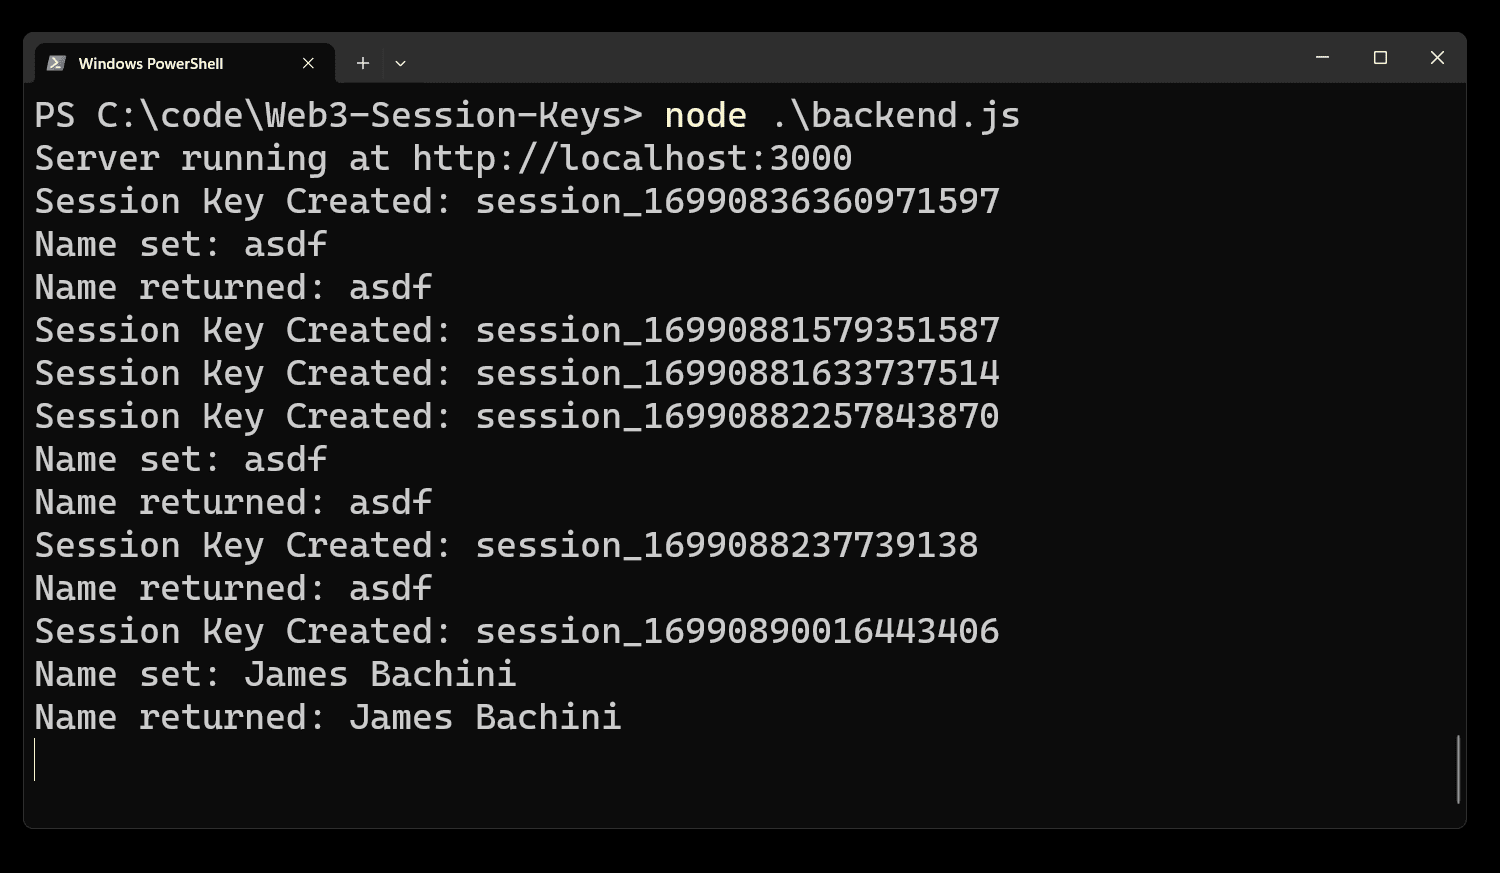
On the backend there is some logging and you should see something like this:
I hope you’ve found this code useful and it’s provided some inspiration to go out and create the next generation of web3 UI’s. If you want to stay up to date with the latest in blockchain development I have a newsletter at https://bachini.substack.com
