This tutorial will guide you through the process of connecting an Arduino to a Soroban smart contract on the Stellar blockchain. We’ll create a system where blockchain events can trigger physical actions through an Arduino.

All the code for this project is open source at: https://github.com/jamesbachini/Arduino-Soroban-Controller
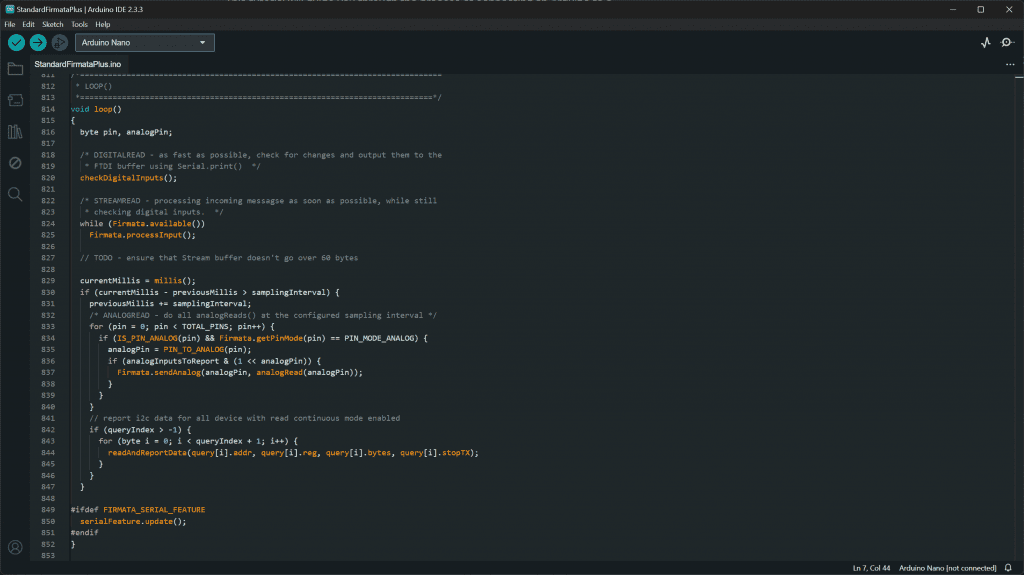
Connect your Arduino Nano to your computer via USB Note the COM port (Windows) or device path (Mac/Linux) for your Arduino Install the Arduino IDE and upload Firmata Plus:
- Open Arduino IDE
- Go to File > Examples > Firmata > StandardFirmataPlus
- Upload to your Arduino

Smart Contract
Now let’s create the Soroban smart contract that will emit events:
#![no_std]
use soroban_sdk::{contract, contractimpl, Env, symbol_short};

#[contract]
pub struct ArduinoSoroban;

#[contractimpl]
impl ArduinoSoroban {
    pub fn launch(env: &Env) {
        env.events().publish(
            (symbol_short!("launch"),),
            1 // Can be used to reference different IO ports
        );
    }
}

mod test;
Let’s deploy this contract. You’ll need Rust installed, there’s more info here on how to setup an IDE for Soroban development.
rustup target add wasm32-unknown-unknown

cargo install --locked stellar-cli --features opt

cargo build --target wasm32-unknown-unknown --release

stellar contract deploy --wasm target/wasm32-unknown-unknown/release/arduino-soroban.wasm --source james --network testnet

stellar contract invoke --id --source-account james --network testnet -- launch
Controller
Create a new Node.js project and install the required dependencies for stellar-sdk and johnny-five. Then create a controller.js file and use this code, remember to replace the ContractID you just deployed on line 5.
const { Board, Led } = require("johnny-five");
const StellarSdk = require('stellar-sdk');

const rpc = new StellarSdk.SorobanRpc.Server('https://soroban-testnet.stellar.org');
const contractId = 'YOUR_CONTRACT_ID_HERE';
const eventsProcessed = [];
let firstRun = true;
let power = false;

// Initialize the board connection
const board = new Board({
    port: "COM3"  // Change this to match your Arduino port
});

board.on("ready", async () => {
    console.log('Board ready...');
    runLoop();
});

// Main loop function to check events and toggle LED based on conditions
const runLoop = async () => {
    while (!power) {
        await checkEvents();
        await new Promise(resolve => setTimeout(resolve, 3000));
    }

    // If power is true, turn LED on and off with delay
    const led = new Led(3);
    console.log('Turning On...');
    led.on();
    await new Promise(resolve => setTimeout(resolve, 5000));
    console.log('Turning Off...');
    led.off();
    power = false;

    // Restart loop after LED toggle
    runLoop();
};

// Function to check and fetch the latest events from the blockchain
const checkEvents = async () => {
    console.log('Checking Events...');
    const latestLedger = await rpc.getLatestLedger();

    const eventsResponse = await rpc.getEvents({
        startLedger: latestLedger.sequence - 8000,
        filters: [
            { type: "contract", contractIds: [contractId] },
            { type: "system", contractIds: [contractId] },
            { type: "diagnostic", contractIds: [contractId] },
        ],
    });

    processEvents(eventsResponse);
};

// Process each event and update power state based on specific conditions
const processEvents = async (eventsResponse) => {
    for (const event of eventsResponse.events) {
        if (!event.topic[0]) return;

        const topicString = event.topic[0]._value.toString();
        const alreadySeen = eventsProcessed.includes(event.id);

        eventsProcessed.push(event.id);

        if (!alreadySeen && topicString === 'launch' && !firstRun) {
            console.log('######### LAUNCH ##########');
            power = true;
        }

        firstRun = false;
    }
};
When the contract is invoked, the controller will:
- Detect the launch event
- Turn on the LED connected to pin 3
- Keep it on for 5 seconds
- Turn it off and resume listening for new events
This tutorial demonstrates the basic principles of connecting physical hardware to blockchain smart contracts. The possibilities for IoT and Web3 integration are vast, from automated systems to decentralized device networks.
Remember to adapt the code to your specific needs and always prioritize security when dealing with hardware automation.
All the code for this project is open source at: https://github.com/jamesbachini/Arduino-Soroban-Controller
This video is for informational purposes only. Fireworks are dangerous and should only be handled by professionals in controlled environments. Do not attempt to replicate any actions shown. Always follow local laws and safety guidelines when handling fireworks and associated electronics. Please note that I am compensated as a developer in residence to produce content around building on Soroban and the Stellar network. All Code is experimental, has not been security audited by 3rd parties and is provided for educational purposes only.


